Solar (pt2)

So onto phase two and almost complete redesign of the charging, storage and generation system.

As with a lot of this build, cash flow dictated a step by step upgrade and even after all this time, some of my planning wasn’t very forward thinking. . . .

Step one was to get more visibility on what the solar panels were doing. I knew it wasn’t enough but I needed to know more. I went with the Victron Energy 75/15 Smart solar MPPT controller. This gives historic monitoring and Bluetooth display of generation, voltages etc. On phones and Macs (not PCs weirdly). They have a fully configurable charge profile (for lead acid/Lithium) which worked with future upgrades.

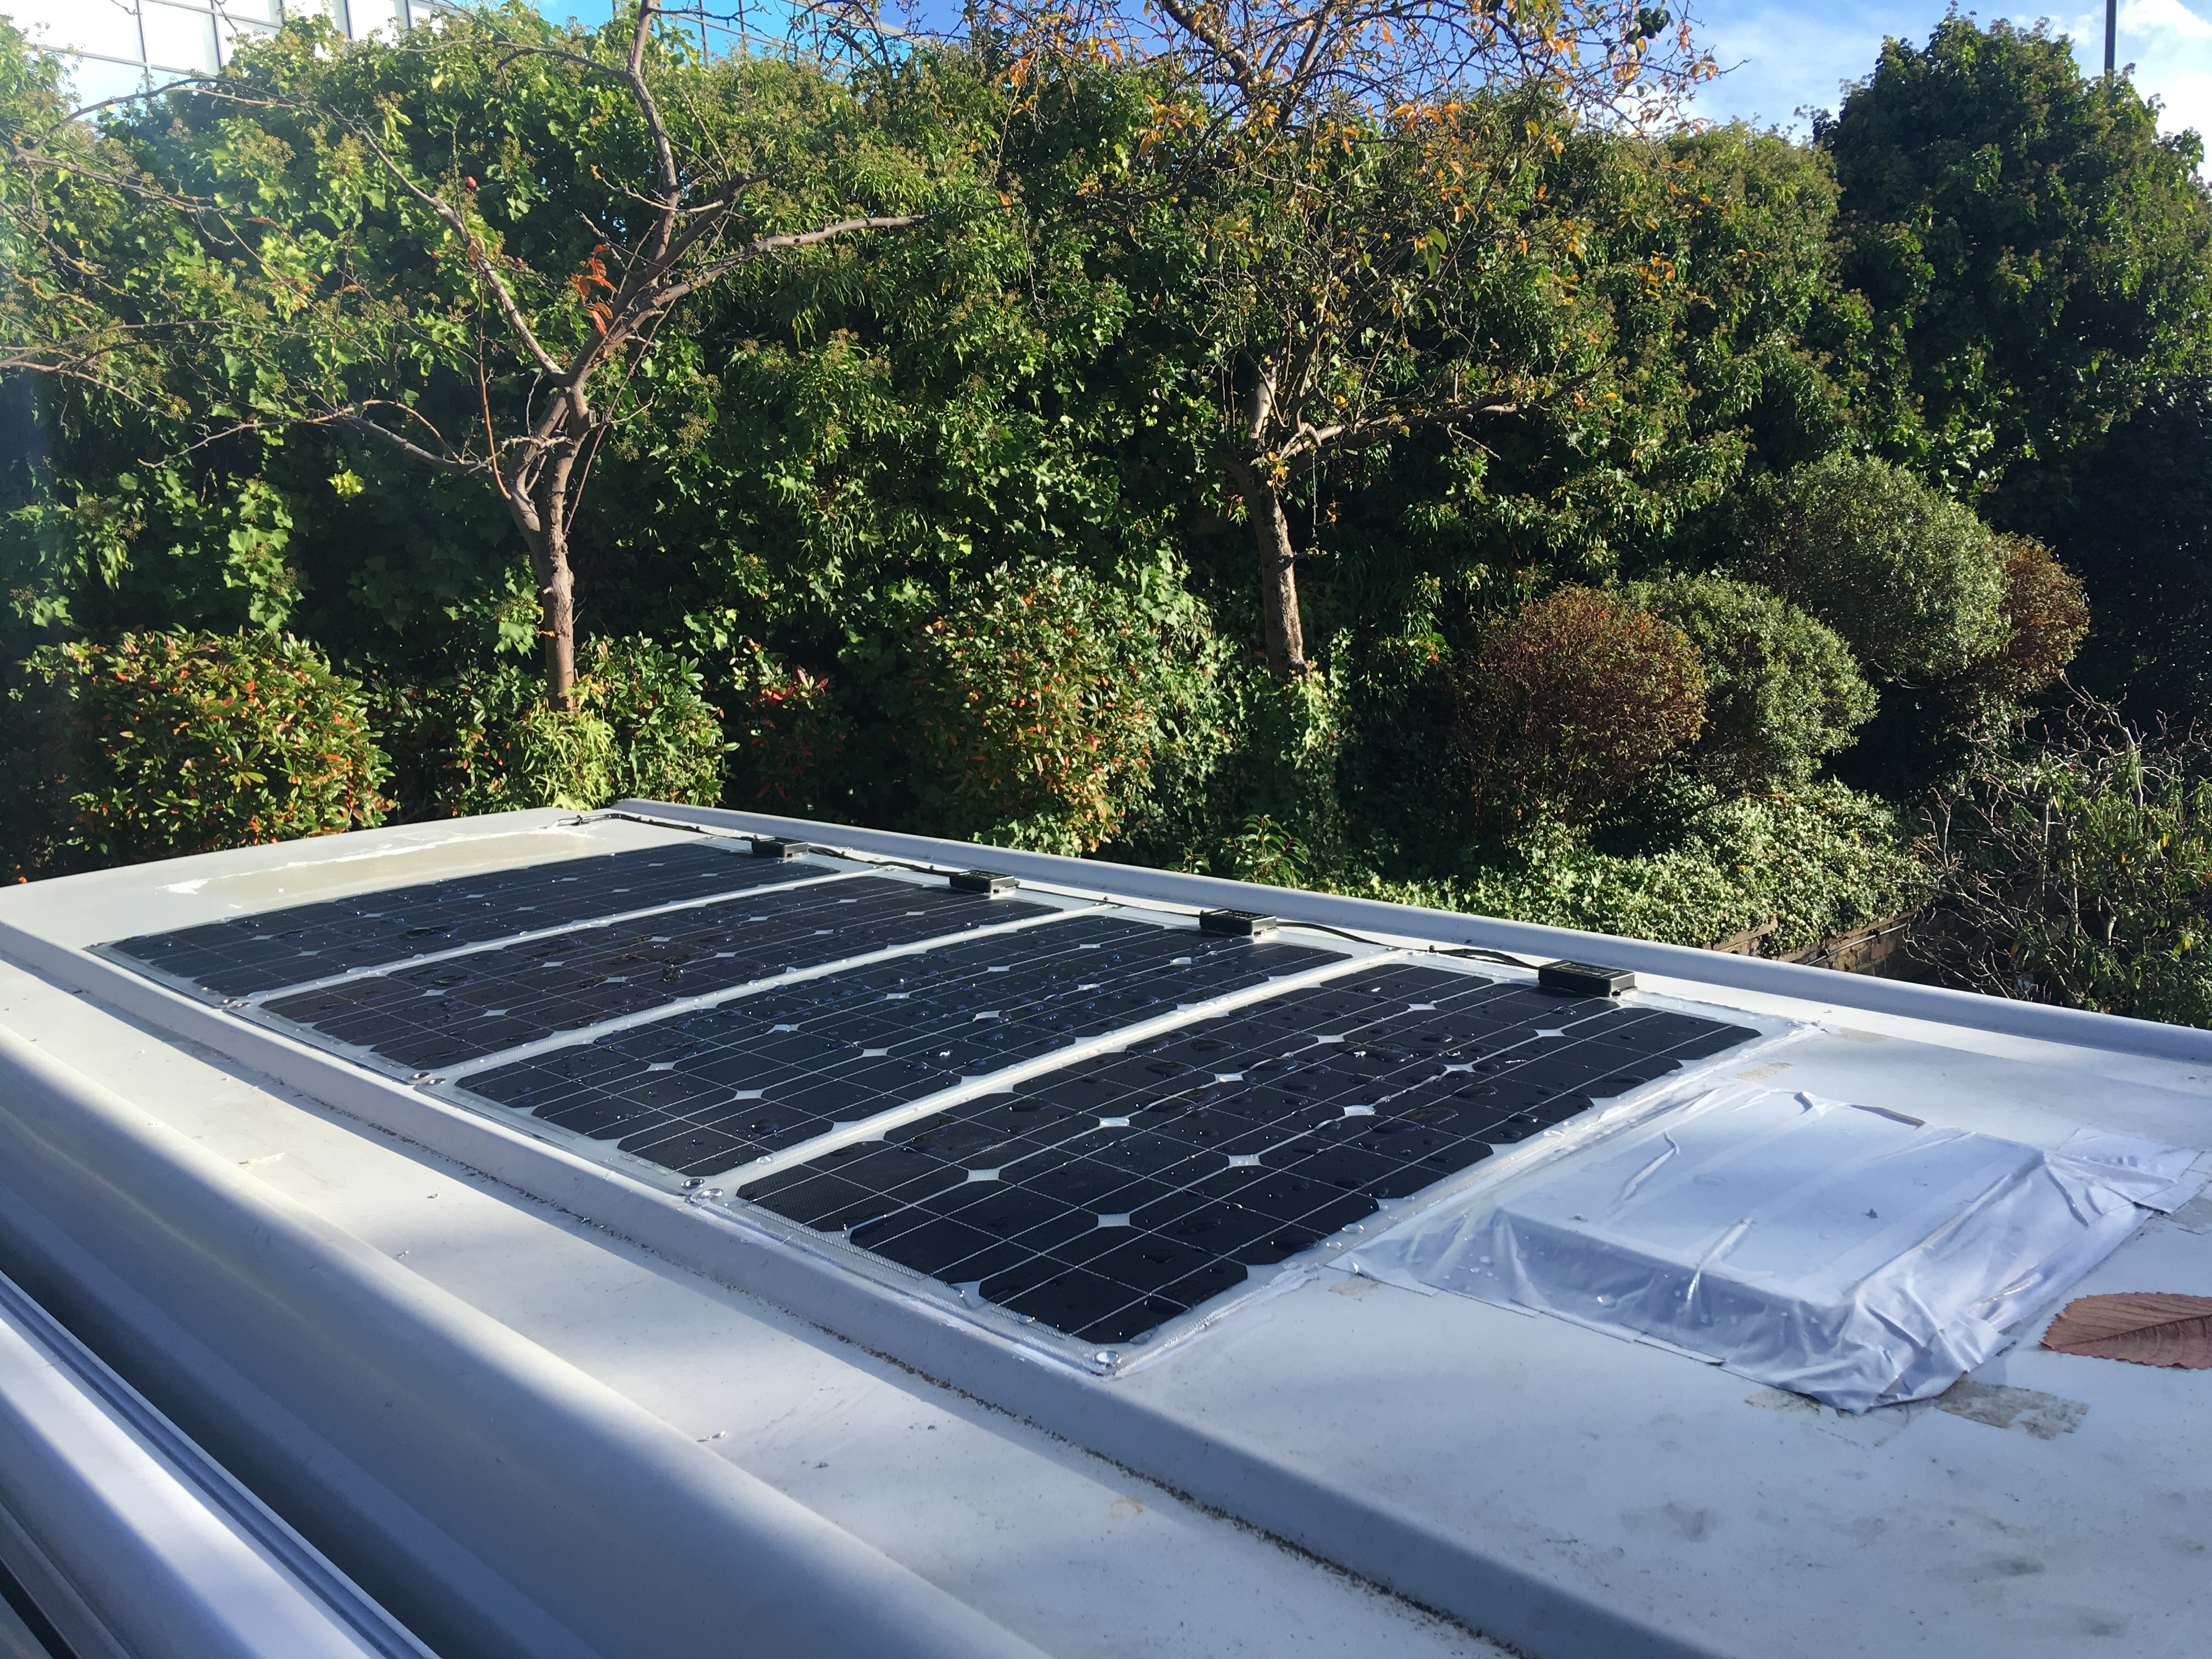
Next up was the solar panels. I wanted more, the question was how to fit more on the roof. I found that Lensun sell semi-flexible 50W panels that are roughly the same length as the width of the central section on the roof. This allows me to easily go to 200w and I connected the panels in a series/parallel config (48V system). Parallel panels are meant to be more resistant to shading, series gives you an earlier start to charging, combination hopes to surf the middle ground!

There were other reasons I went with the Lensun. Having previously had a cheap ebay panel, I wanted a higher quality panel but still wanted to stay with the semi-flexible panels. The semi-flexible panels are notorious for not being the most reliable but they are lightweight and low profile. Lightweight means less issues with the roof struts (think they would need upgrading for extra weight). The lensun claim a better construction and do have aluminium backing. They have a golf ball type surface which they claim helps keep them clean, which for the dusty environments the van sees is important to me. The junction box also appears much more robust. The cheap ebay panels have a junction box with a thin profile and I was always concerned that wind and vibration may be one of the faliure modes for these panels. The lensun panels have a much wider flatter box.

Without any doubt the traditional glass panels are more robust but the cost of additional height and weight.

I went the messy above, clean below install route. I have seen lots of beautiful roof install pics where the solar cables go straight through the roof and are dressed inside. I wanted to keep a single roof penetration and keep wiring inside the van invisible, so it’s not invisible on the roof!

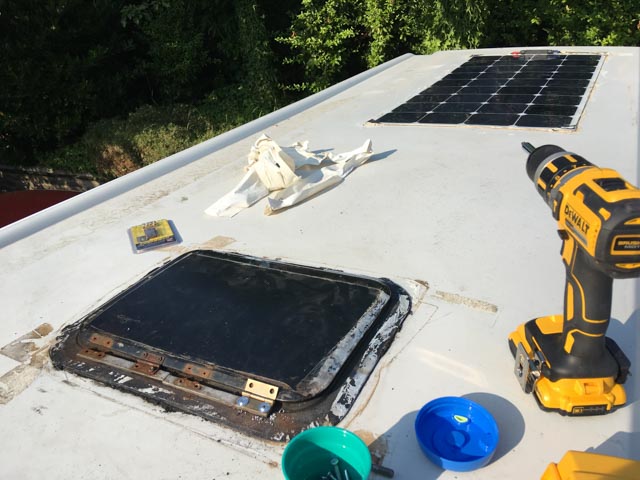
In retrospect, I would have installed them all lower allowing for me to fit 300w by covering my broken roof vent (as an option, still looking at ways to get that working again).

I have seen others fit 300w on these vans but only by fitting the panels over the gutters rather than between them. The gutters and roof hatch otherwise limit you.

Next step was storage. The flooded lead acid 110AH battery was massively struggling to give out anything like its 1320Wh plate figure. A guess would put its real capacity more like 500Wh.

I read more and more into the Lithium batteries and although the cost is high £1000, the promise of a true 1kWh+ storage in the same space with less weight was alluring. The other factors are the reduction in round trip energy. In lead acid charging the last % is wasteful, so lots of the solar energy is lost. With lithium it more or less all goes back so your overall solar energy requirement drops. I found a bloke selling off 130Ah lithium Reion batteries from a failed EV project for £300 so I bit his hand off.

So at this stage I had updated the solar, solar charger, battery. Next was dealing with the charging and monitoring. I had done one winter trip with the lithium and relied on just turning alternator charging on and off with guess work as to charge times. Far from ideal. At this point we are in the world of trying to integrate a third party Lithium battery into a Victron Energy system. The solar charger worked fine but one has to find a way to make a BMS for the Reion.

I went the option of using the Victron Lithium split charge relay Cyrix-Li-ct and installed their BMV-712 battery monitor to use as a BMS. This has a relay output. Initial idea was to set this to cut the alternator charging when the capacity reached 95% (using the solar to do the remainder). Unfortunately you can set the relay to work on low state of charge but not high. Instead the relay is set so that it disconnects if the battery hits its float voltage and if that happens, it won’t start charging again unless the voltage drops considerably (level can be set)

So far I pretty much manage to run on solar alone for most of the year, I have a switch to disconnect the split charge that is generally turned off apart from winter months.  I have generated nearly 700wh/day in summer, can struggle to hit 100 in winter.  The fridge is circa 2-300wh.

And that for now is that! Some wiring modifications were included as well but I will cover that separately

Solar conversion pt.1

So to recap, when I got the van it had no coach electrics. The split charge solenoid had been replaced with a simple relay by the previous owner and this had died. The battery was completly flat.

I needed a system that could power a C60i fridge and deal with the split charging (thanks to others for this one). I decided to go for an all in one unit (Ctek D250SA). This went where the converter/mains charger once was. I ripped out the converter as all the mains voltage had come out of the van (due to multiple reasons).

Working out what I needed power wise without any experience was tricky.  I found places saying 1w solar for 1L capacity (this might work on a sunny day in a nice climate but is way low for general use).  Ran into people using the C60 with 100w solar that thought it was self sufficient.  I figured double the 1w – 1L would work out but was still low.

For the solar panel I got an ebay ‘140w’ semi flexible panel and bonded it onto the roof with the recommended adhesives. The CTEK gave the advantage that the system even kept the starter battery topped up and the all in one solution gave proper charging and MPPT all in one.

This did not include monitoring of any kind and who needs it as long as your system always provides enough power! The problem of course when it doesn’t.

I had volt meters on both batteries (as part of USB charging) but doesn’t give you any indication of what the panels are doing and when you are heading into negative production.

I managed 3 days in a Spanish desert in high heat with no problems, but my panels were facing south and I could keep the tent vents open most of the day to keep the ambient temps down.

3 or 4 days in a festival in portugal and the fridge was cutting out.  Lots of sun but parking meant I had to be parked East-West, there was lots of dust from a road meaning we had to keep the tent vents shut and dust got on the panels.

Where to go next was a problem. The shape of the panel was too long to get a second on the roof, so in the end I had a complete system change.

Early solar instal with cheap ebay panel in the background while I tried to salvage the roof hatch that had rusted through hinges.

A little review of the Winnebago Eurovan

A lot is said of the Winnebago eurovan and I want to address a few bits of it. There are a lot of things that I think Winnebago did well and lots which is not so good.

The gas (LPG) tank

Am

The roof

-Much hated there is lots wrong but there are also some really good points.

-Canvas tent

Probably as much the age of the van as anything else but I really like having a canvas as opposed to a nylon tent. It’s the same with real tents, canvas is great because it breaths but awful because its heavy (if your hiking). Works better to me than a modern tent.

Windows in the canvas tent

I don’t know why no-one else seems to get this right. Big windows that open to reveal a mosquito net beneath. Van lights attract bugs, this seems like a no-brainier. Unfortunately if you look at lots of modern pop-top tents they dont have this instead having a useless see-through layer under the window (I suppose they allow light not wind but getting air in is also useful).

The 3 big windows are also surprisingly not common.

The roof vent also seems like a nice idea but poorly implemented. I looked to swap for another modern vent but they are all 100m high. The original one is more a sunroof type vent, no extra height and this is really important to me.

Yes, the actual plastic roof is poorly done. I remain unconvinced whether elevating only the van and not the cab is the best idea. Mine is craceds as many are. They don’t latch down nicely.

Insulation (or lack therof)

It seems there are some real differences between how the brits and the yanks build campervans. In the UK, insulating a van is something that is done first, everything has insulation. Aircon and heating? Much less common. Yanks seem to be the other way around. I was always planning on having a heater and it is seriously useful. My van actually has broken cab heating, so the rear heater is actually useful for warming the van up generally too!

The aircon has been a nightmare but at times really useful.

Build quality (or lack thereof)

The van is put together with metal self-tapping screws. No threaded inserts etc. If something is bolted through a surface then the bolt on the other side is not captive. If it goes through the floorpan, it takes two people to remove a bolt, one either side. No bolts have Mylar inserts when they should.

Lots of bolts have self tapping into plastic (heating vents etc) which just fails.

Wiring

This really does follow the build section. The wiring additions are poorly done with no proper colour coding (black, green or purple are the colours). Tracing wiring is very diffult and mine isn’t wired as per the winnebago diagram (similar but clearly varied over the years slightly.

Off grid capability

The LPG tank is awesome. Can still travel on the Eurostar. Filling with gas is super cheap and lasts ages (even in winter). No issues with different bottles in other countries. If really going to need to top up abroad bring LPG adapters. Building an off-grid setup today, solar and compressor fridges are where most of us go but this wasn’t an option back then.

The tank is kind of dangerous today. Very easy to over fill even if you follow the (misleading) eurovan manual. Apparently there were warnings on the tank at one point. New tanks stop filling automatically, these old ones do not.  I am not sure its possible to actually fill it up the way intended in a petrol station (involves opening an overflow valve).  I watch the meter now (which I had to replace).

Bed

Easy to remove, sliding rock& roll bed!  Hits a lot of points for flexibility, even if its not the best implemented in the world.  I didn’t realise until I had the van that the bed just rolls forward and out on wheels!  Not done it yet but makes putting a motorbike in the back a possibilitu

Cupboards

much hated and really not complete.  The rear wardrobe has dual sliding doors and a door always seems to be in your way.  Wardrobe good for hanging a few small bits only.  See build threads

Middle lower cupboard is deep but awkward

middle bathroom cupboard has no shelves.

Front cupboard doesnt open if the bed is down.