
Partially inspired by the Snazzy labs M1 build (which made the smallest Mini possible) https://www.printables.com/model/139893-shrink-the-m1-mac-mini , another case mod for the M2 Mac Mini, this time focused on weight and power options. A failed attempt at creating a OSX based do-it-all mobile compute module.
While the Snazzy build went for a minimal size desktop, removing the original rear panel to reduce empty space, my build retained it for simplicity and as a result, still has empty space inside. Where the Snazzy build used a total of 6 separate 3D printed parts, I did it with one- a single housing sleeve with integrated antenna holder and mounting points. While the result is significantly larger than the Snazzy labs, the aim was light weight over small size.
Context
I have been using Macs since almost the beginning. I started using an iPad as my daily device for meetings and I started using stick PCs as a way of adding a full computer to my bag with minimal weight gain(replacing a laptop). Sometimes I need access to specialist PC software, sometimes its just desktop Outlook or Excel.
The stick PC was successful in the day, while it could be slow, when addressing a certain need, speed isn’t vital. The let downs were lack of storage, no internal network port and limited USB ports and power.
As I downsized my laptop to the excellent (but slow) Macbook 12″, I needed a better compute device to replace both the stick PC and a virtual PC. I moved to a NUC at this stage, selecting the new 7th gen i3 with its low TDP which allowed smaller PSUs. While the NUC added weight compared to a stick PC it gave me lots of power, storage, HDMI 2.0 (unusual at the time) and powerful USB ports (doubling as a USB Charger). It has served me well for 6 years, it found use not only directly connected to an iPad but also to drop places and remote into (I often need to be on two air-gapped networks).
Always looking for better solutions and the possibility of moving to OSX, I started considering replacing the NUC. Some of its failings are Duet display- while once reliable is completely unreliable now on PC. Getting connected to the NUC other than via remote desktop can be challenging. The NUC was also stuck on windows 10, while not really an issue, it highlights that its an aging machine.
Choosing a Mini
When the M2 came out, I did look at whether it would replace my quad core i7 2012 mini but the prices of apple storage is insane. In my view a desktop should have sufficient internal storage, its completely ridiculous that my 2012 Mini came with more storage than the 2023 Mini (it came with the base 500GB drive, most selected the 1TB Fusion drive option at that time). My 2012 mini now has 8TB of internal storage (in the form of 2 x 4TB Samsung SSDs). The limitations in what virtual machines the M2 can run is also a serious issue for for my main machine. I need to run not just Windows but other VMs for appliances and OS. So storage and processor ruled it out as a primary machine.
Some of the things I hate in the design of the M2 as a desktop make it a great mobile device- the lack of expansion makes for small components. It became easy to select the base mini for my intended use as a mobile unit. . The smallest processor reduces powering issues, the base storage limits cost (for something I am hacking)and its is the best value. I did consider an old M1 with its slightly lower power consumption, slightly lower cost but I didn’t think it was worth it for a much older machine.
Build
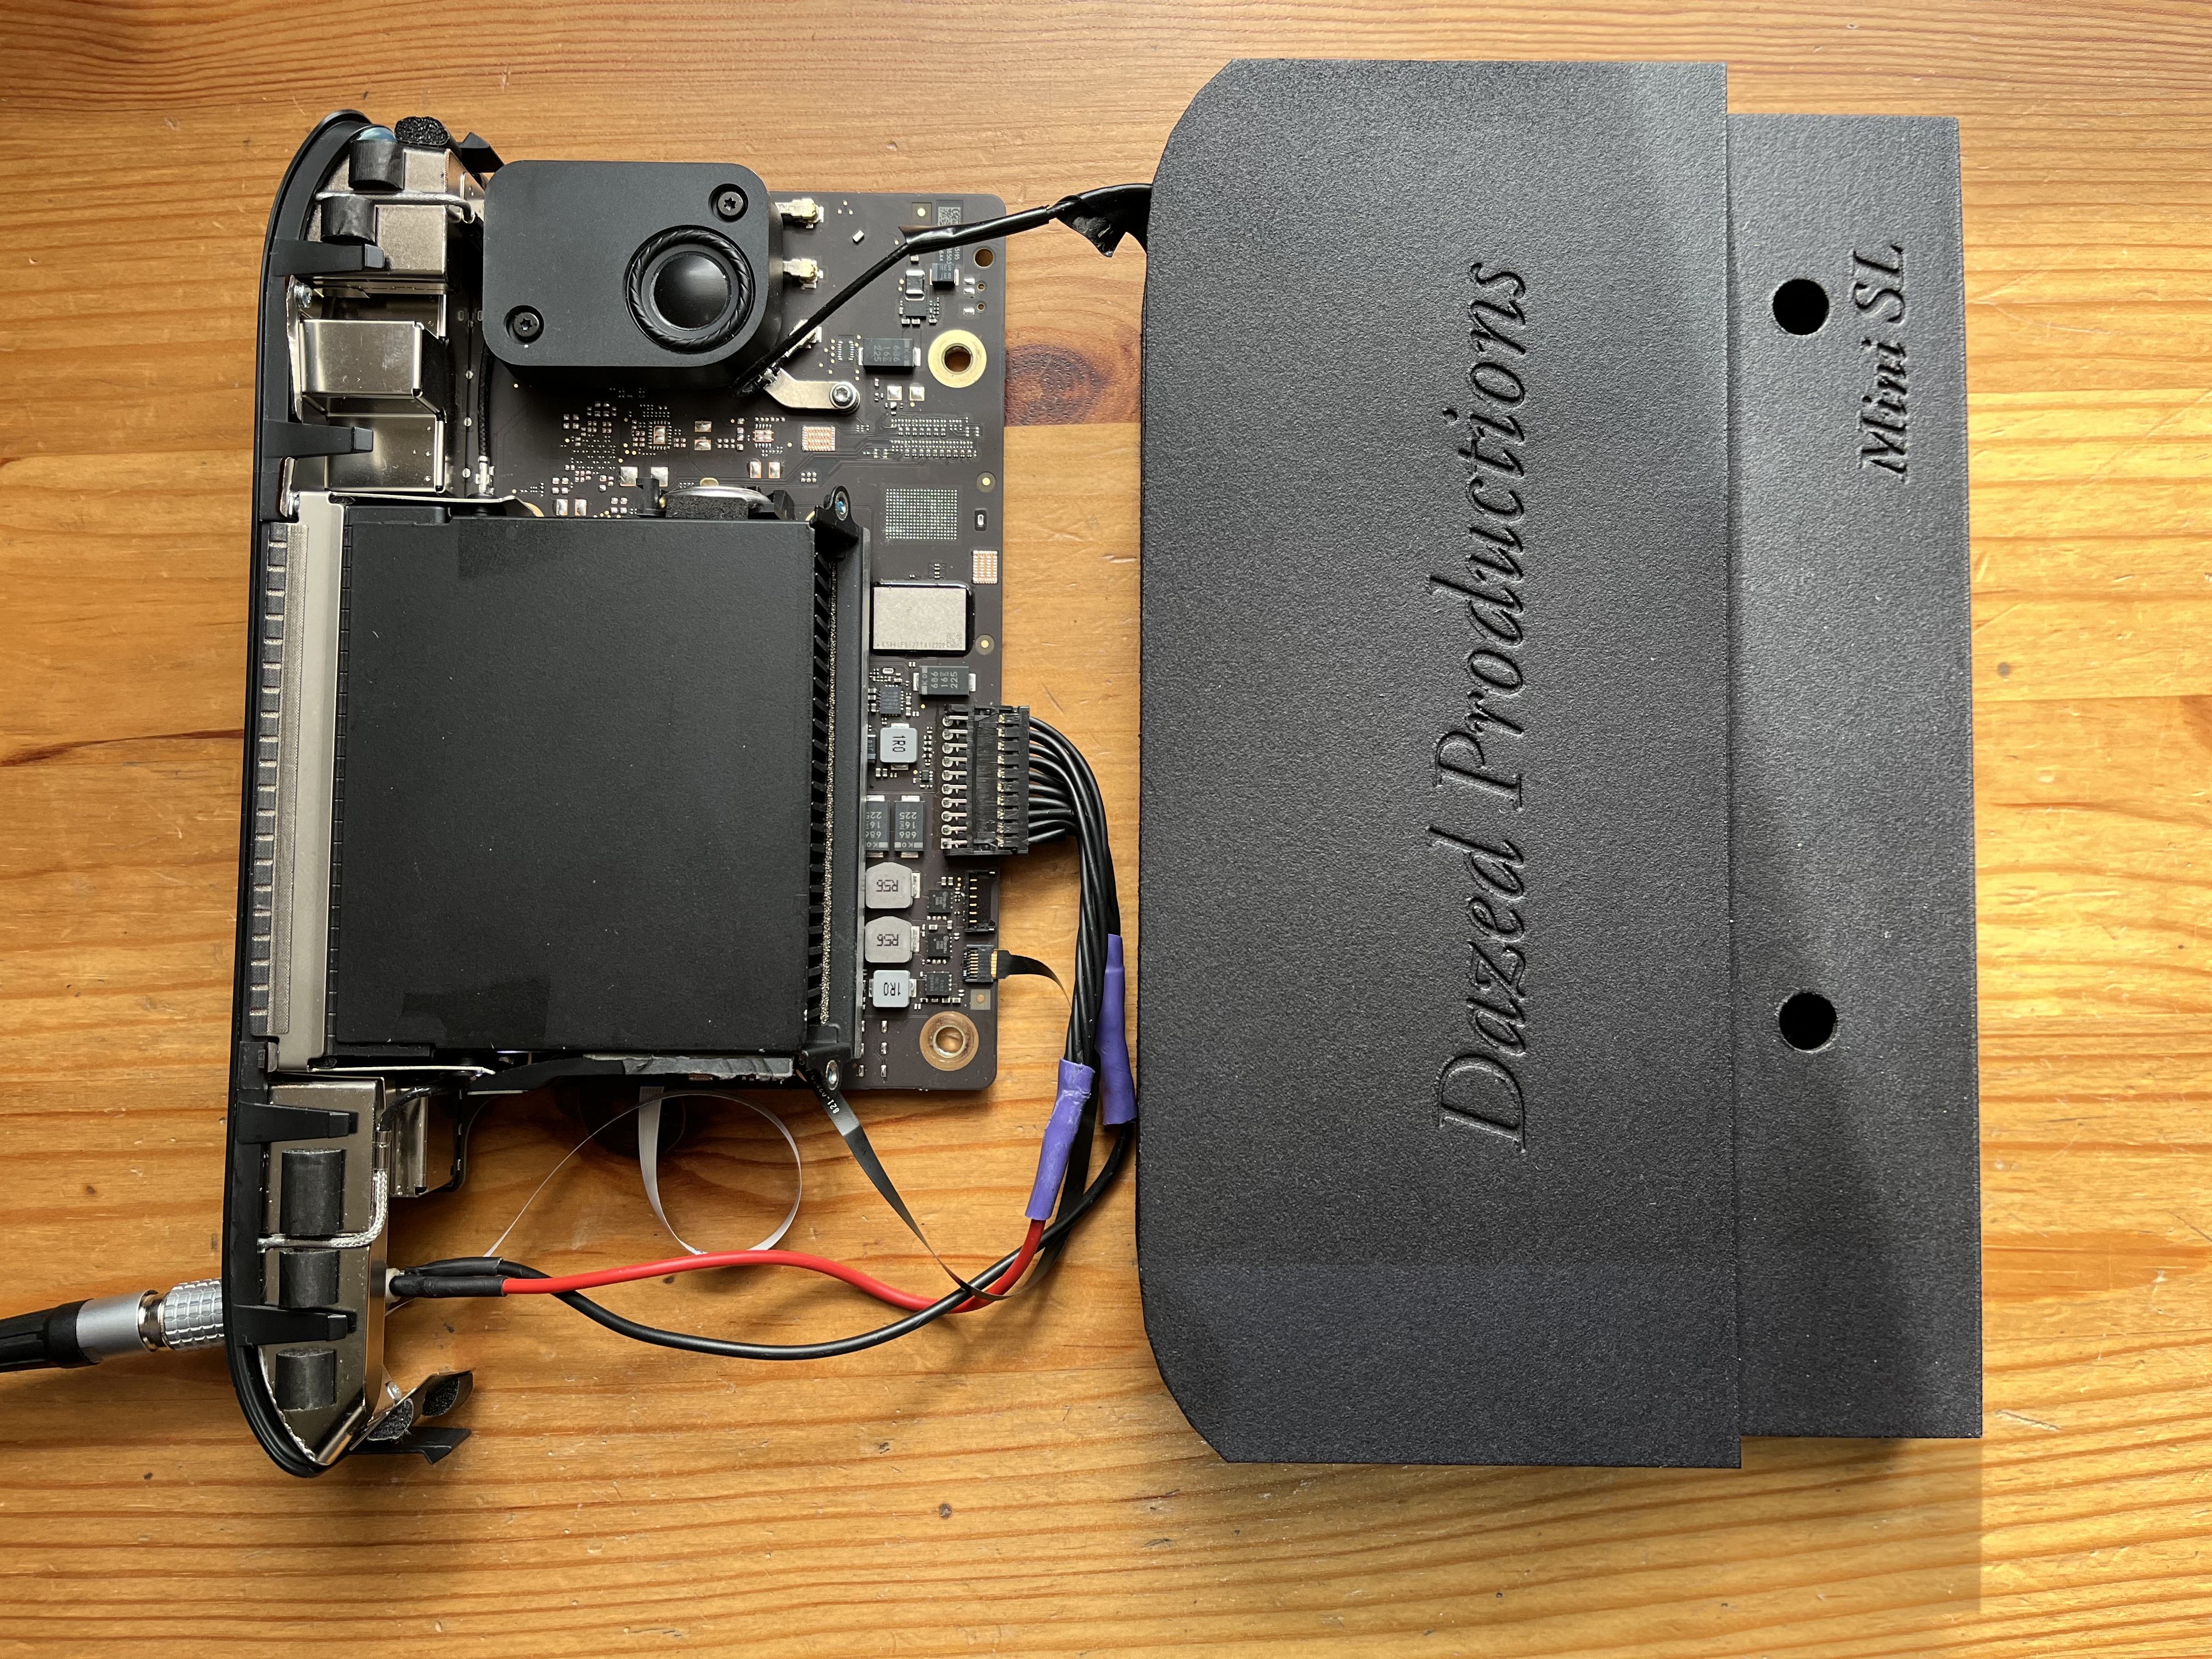
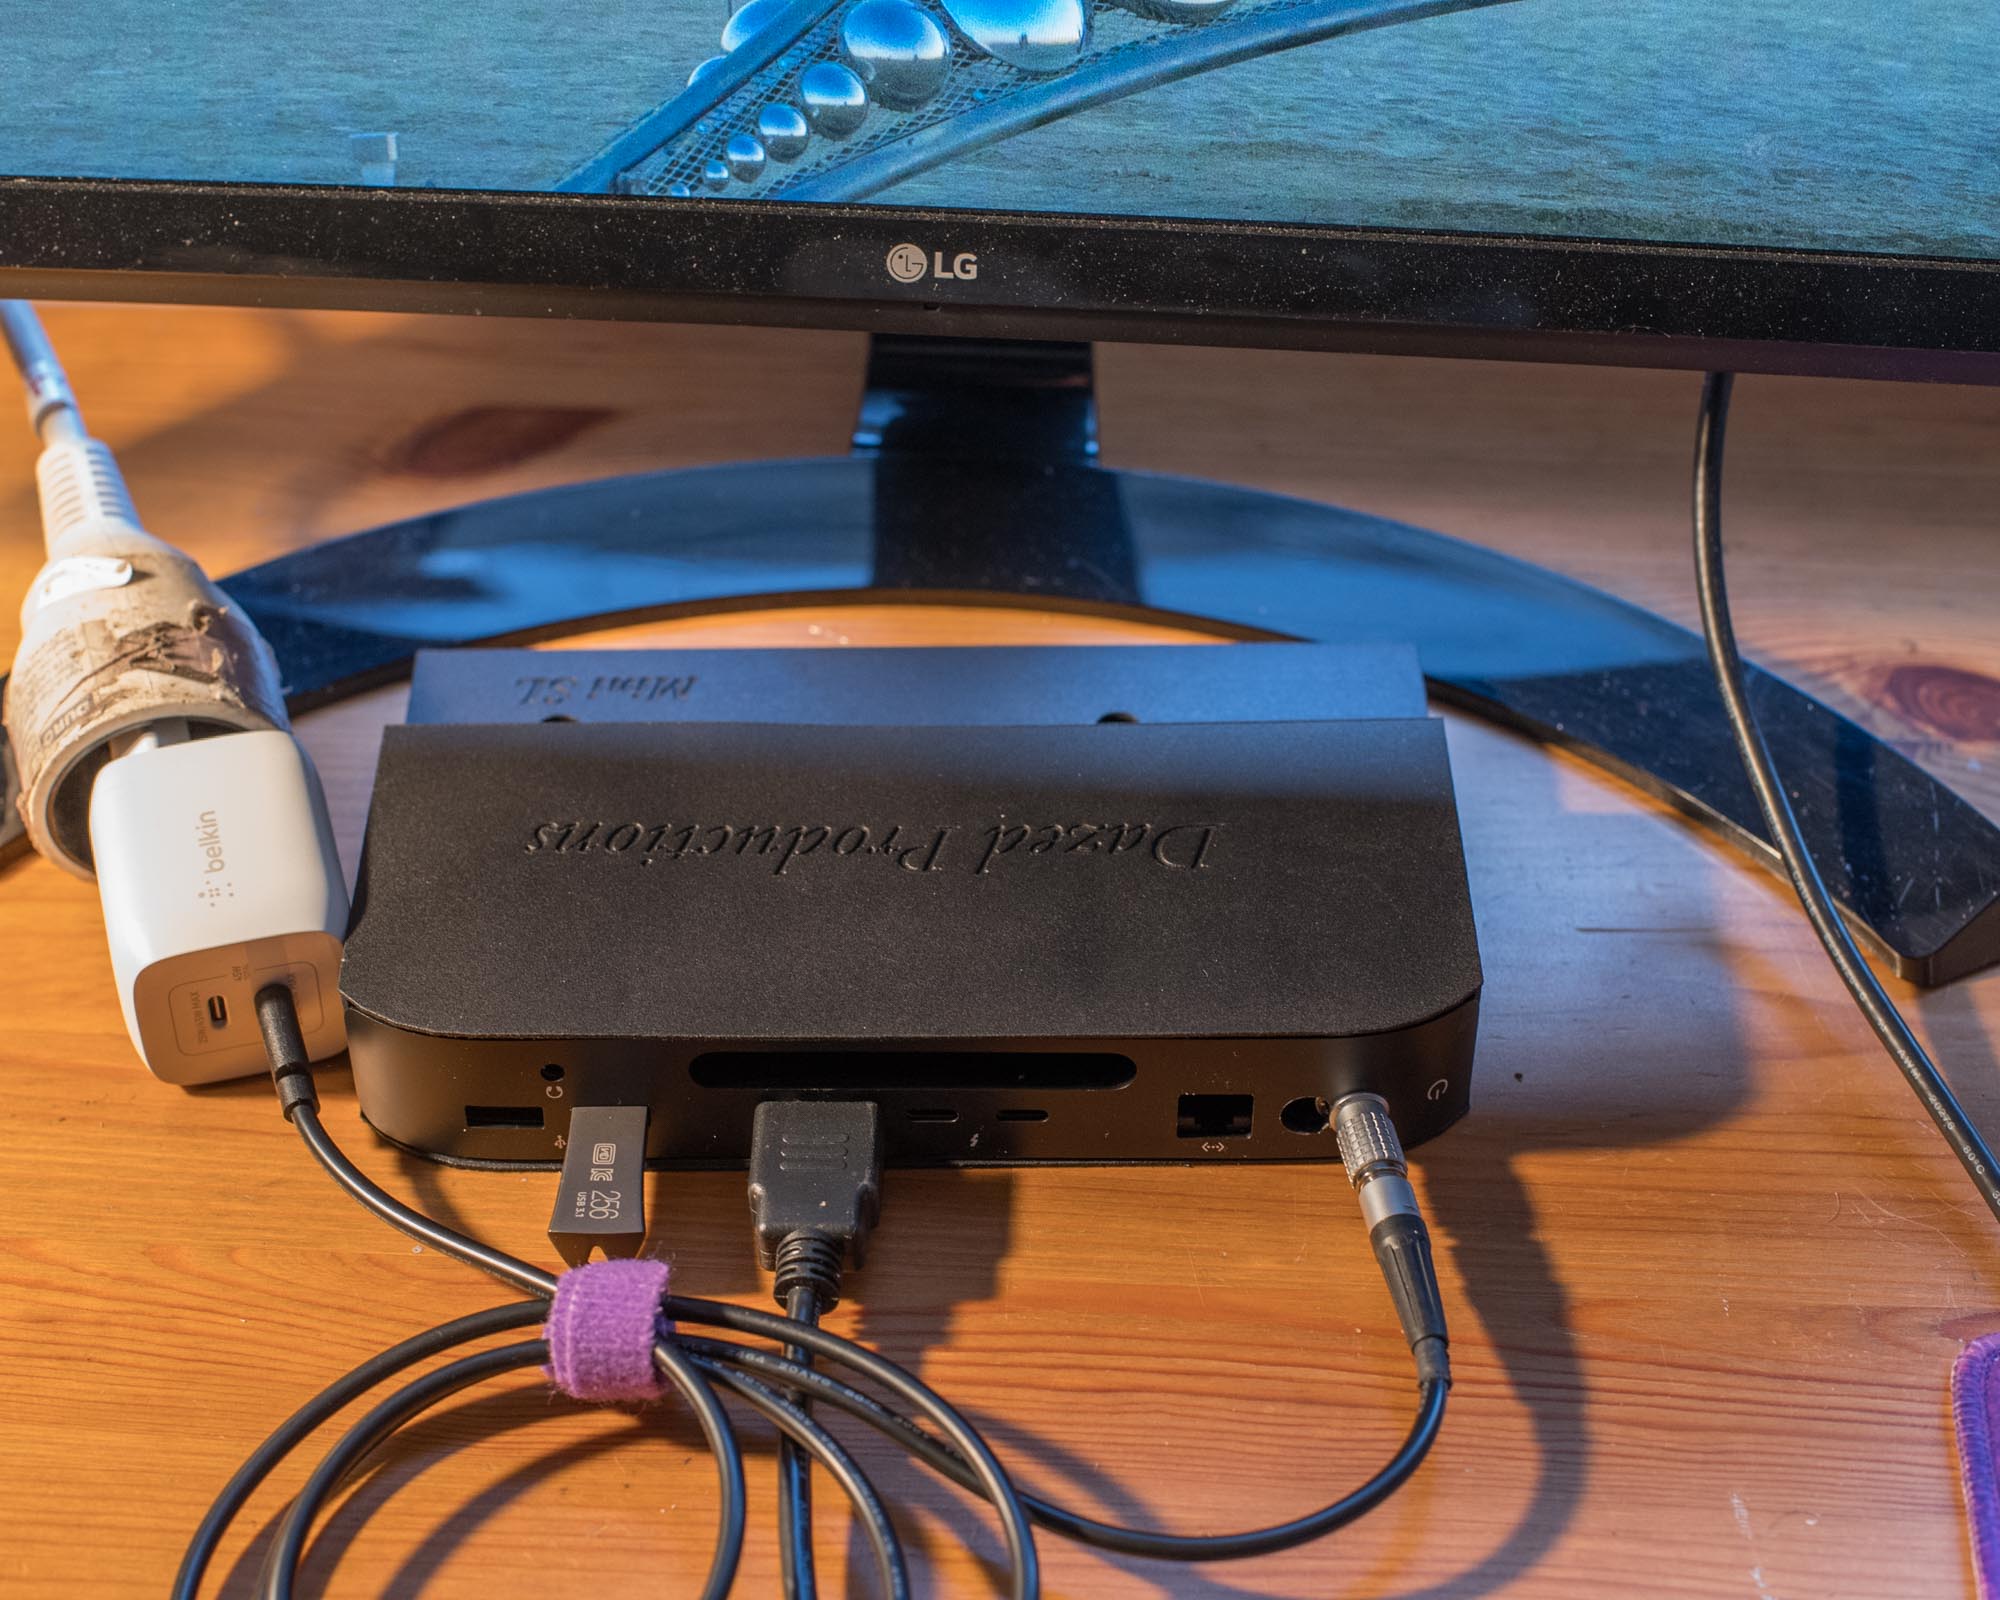
This is a first print from a 3D design, so not without flaws/observations! I am actually quite happy it didn’t need any modifications at all. It was designed in Autocad and printed using MJF technology with PA12 material at a commercial lab (Weerg). It features the same mounting points as the Apple chassis and the mounting points have guide holes for a M2.5 tap (so its held in place with the standard two PCB screws.
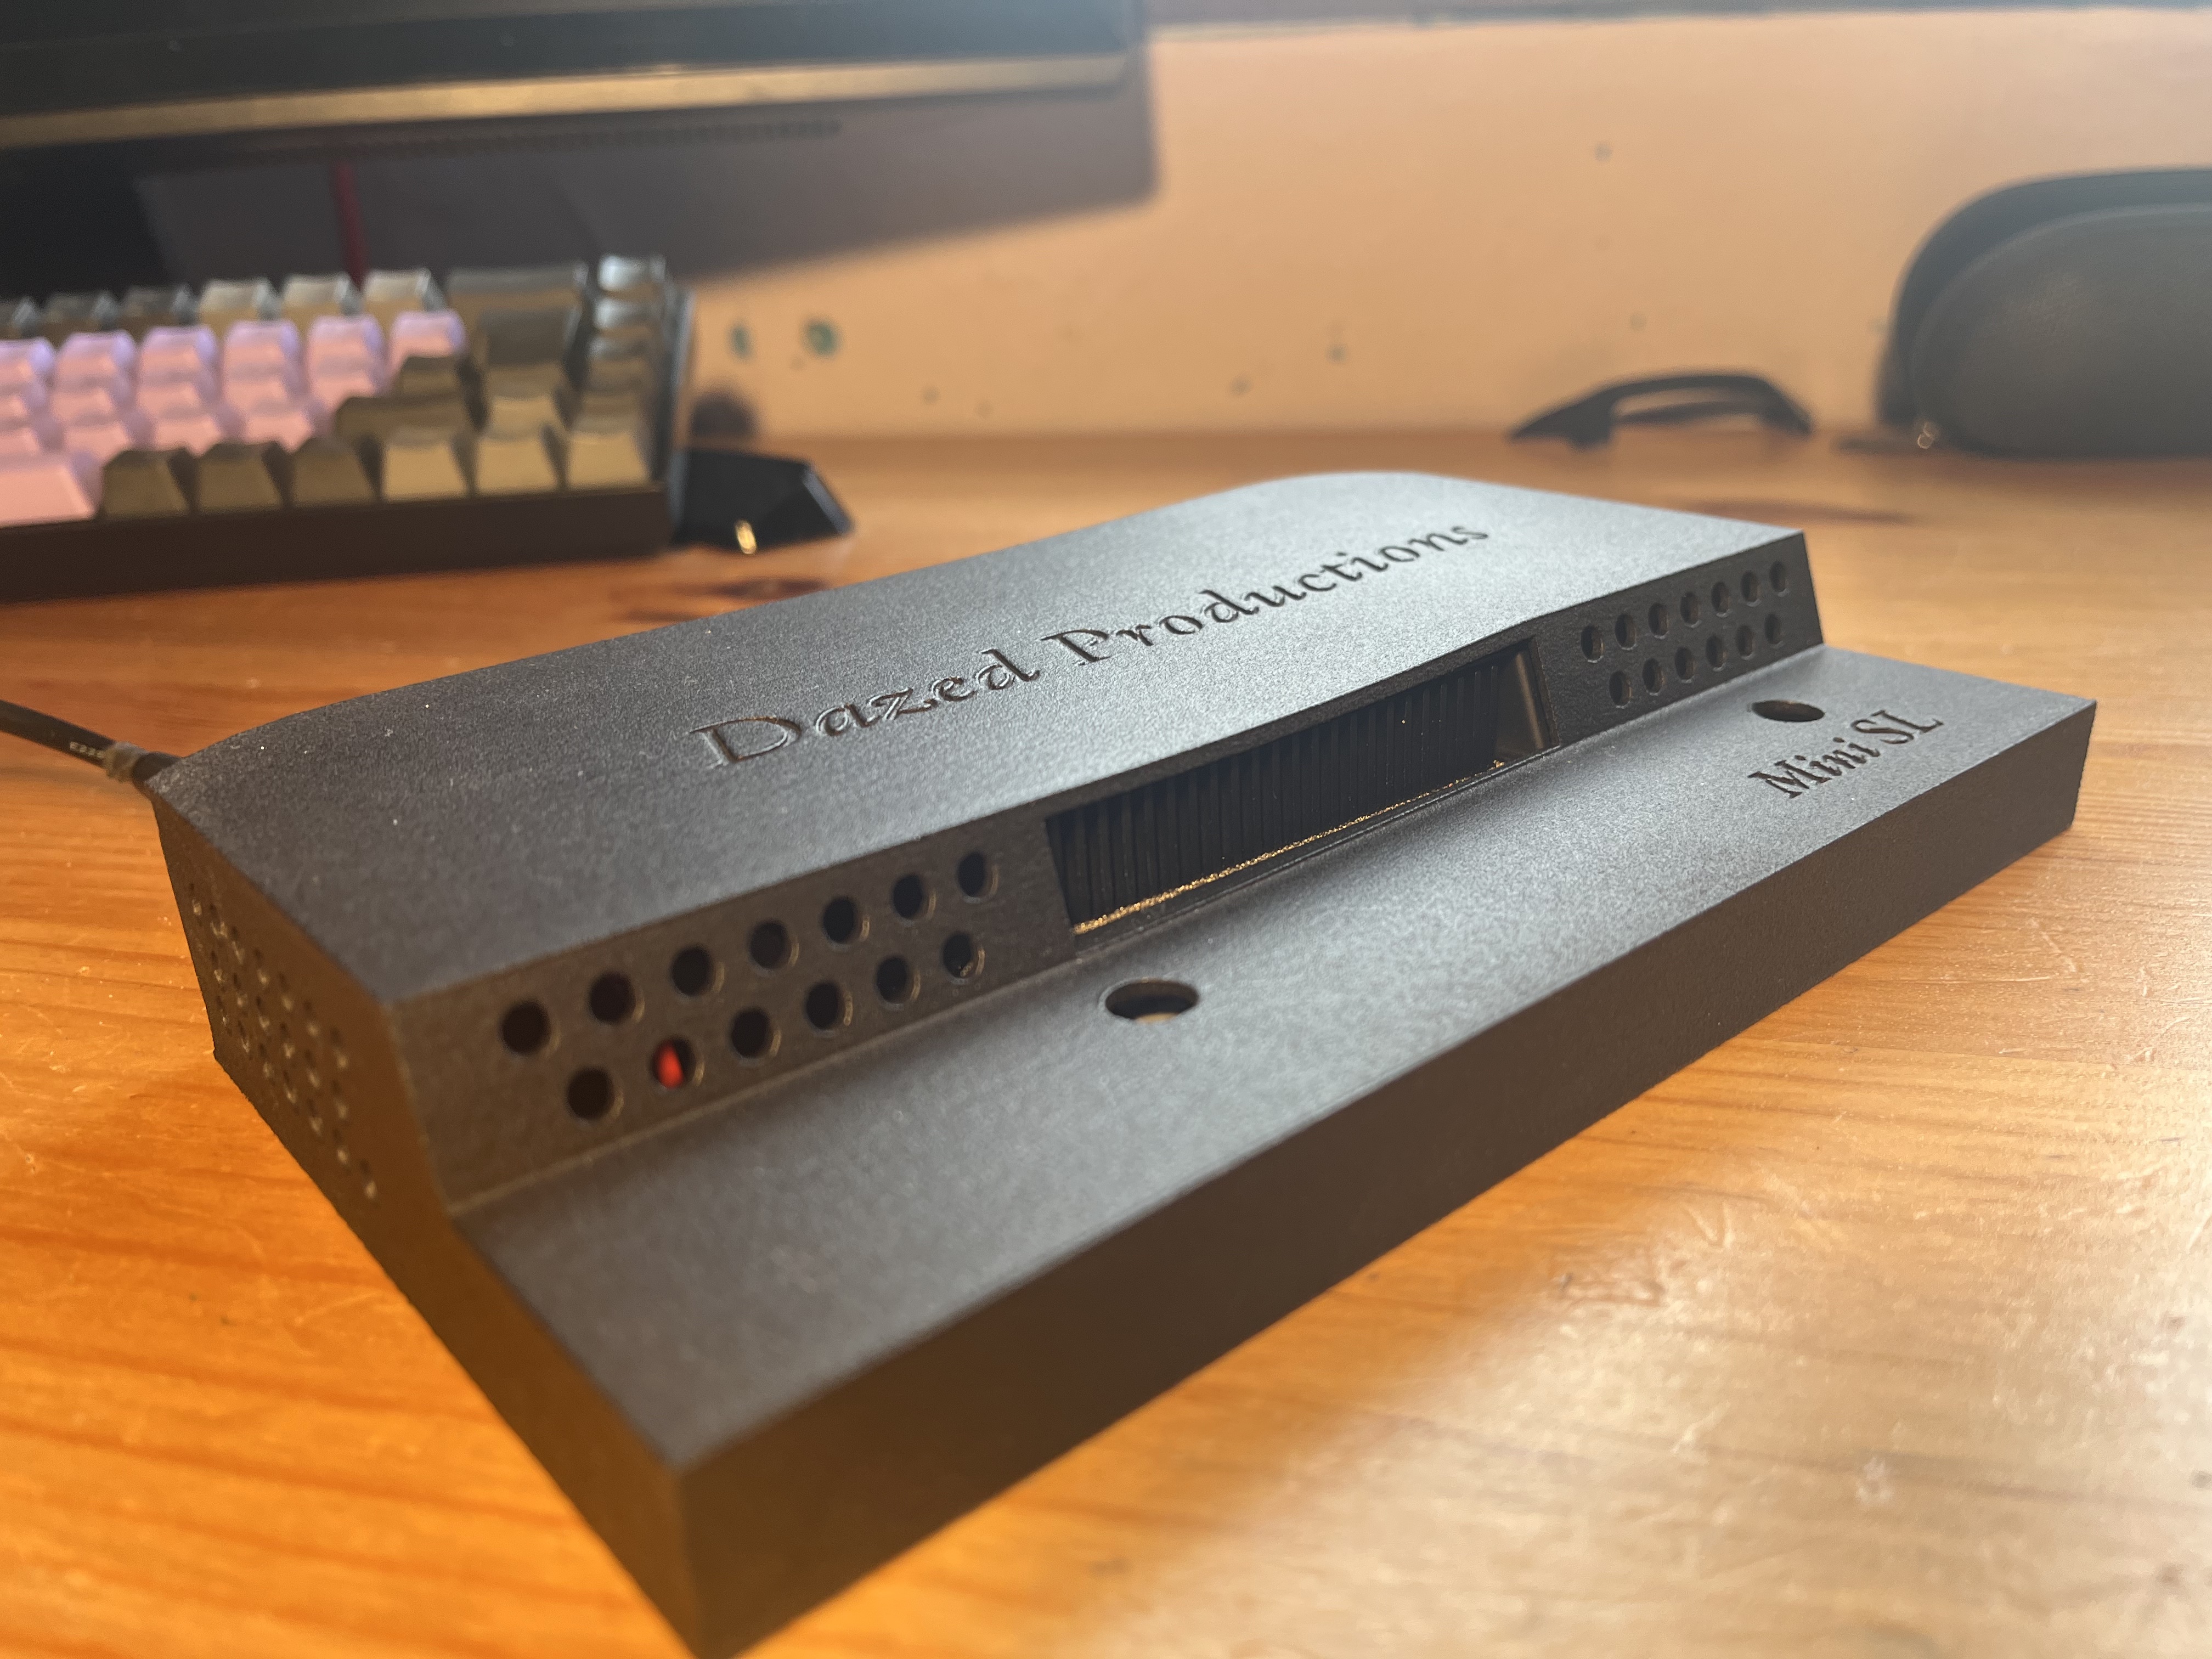
The housing includes a sleeve above the speaker for the antenna.
While my initial thoughts were to retain the fan, after running the Mini as a bare PCB for a few weeks and watching temperatures, I decided to delete the fan as it was running so cool.
I decided to keep the heatsink shroud and match the housing to it, the intent being that hot air would exit from the case rather than circulating inside.
For powering the mini, I wanted a solution that gave easy access to power and didn’t add weight. There were 3 main powering solutions that I chose.
POE- where I work and at home I have easy access to PoE+. While 60W PoE++ exists, its not common on switches and PoE extractors tend to be physically larger, I therefore used a 12V 2A PoE extractor (30W).
USB-C PD- I have to carry a usb-C power supply as it is, and I generally carry an Anker PD-1, which is 30W and super light. I found USB Power cables that break out USB-C to either 12V or 15V. I used 15V as this is a more common PSU Specification.
Battery- To use in my van, and potentially mobile, I wanted to be able to run on lithium 12V batteries (so up to 14.6V)
Power is terminated on a 0B Lemo chassis connector. I use a lot of these connectors in my van and for other 12V power connections. This one is 15V and the wrong gender (compared to my personal standard) so I used 0B as opposed to my usual 1B, which prevents accidents. Its a very nice compact, locking connector with excellent cable strain relief and reliability.
The LED is relocated to the side of the heatsink, held on with 3M VHB tape. The plastic holder requires a little trimming. This allows the LED to be viewed via the cooling vents.
Results- Weight
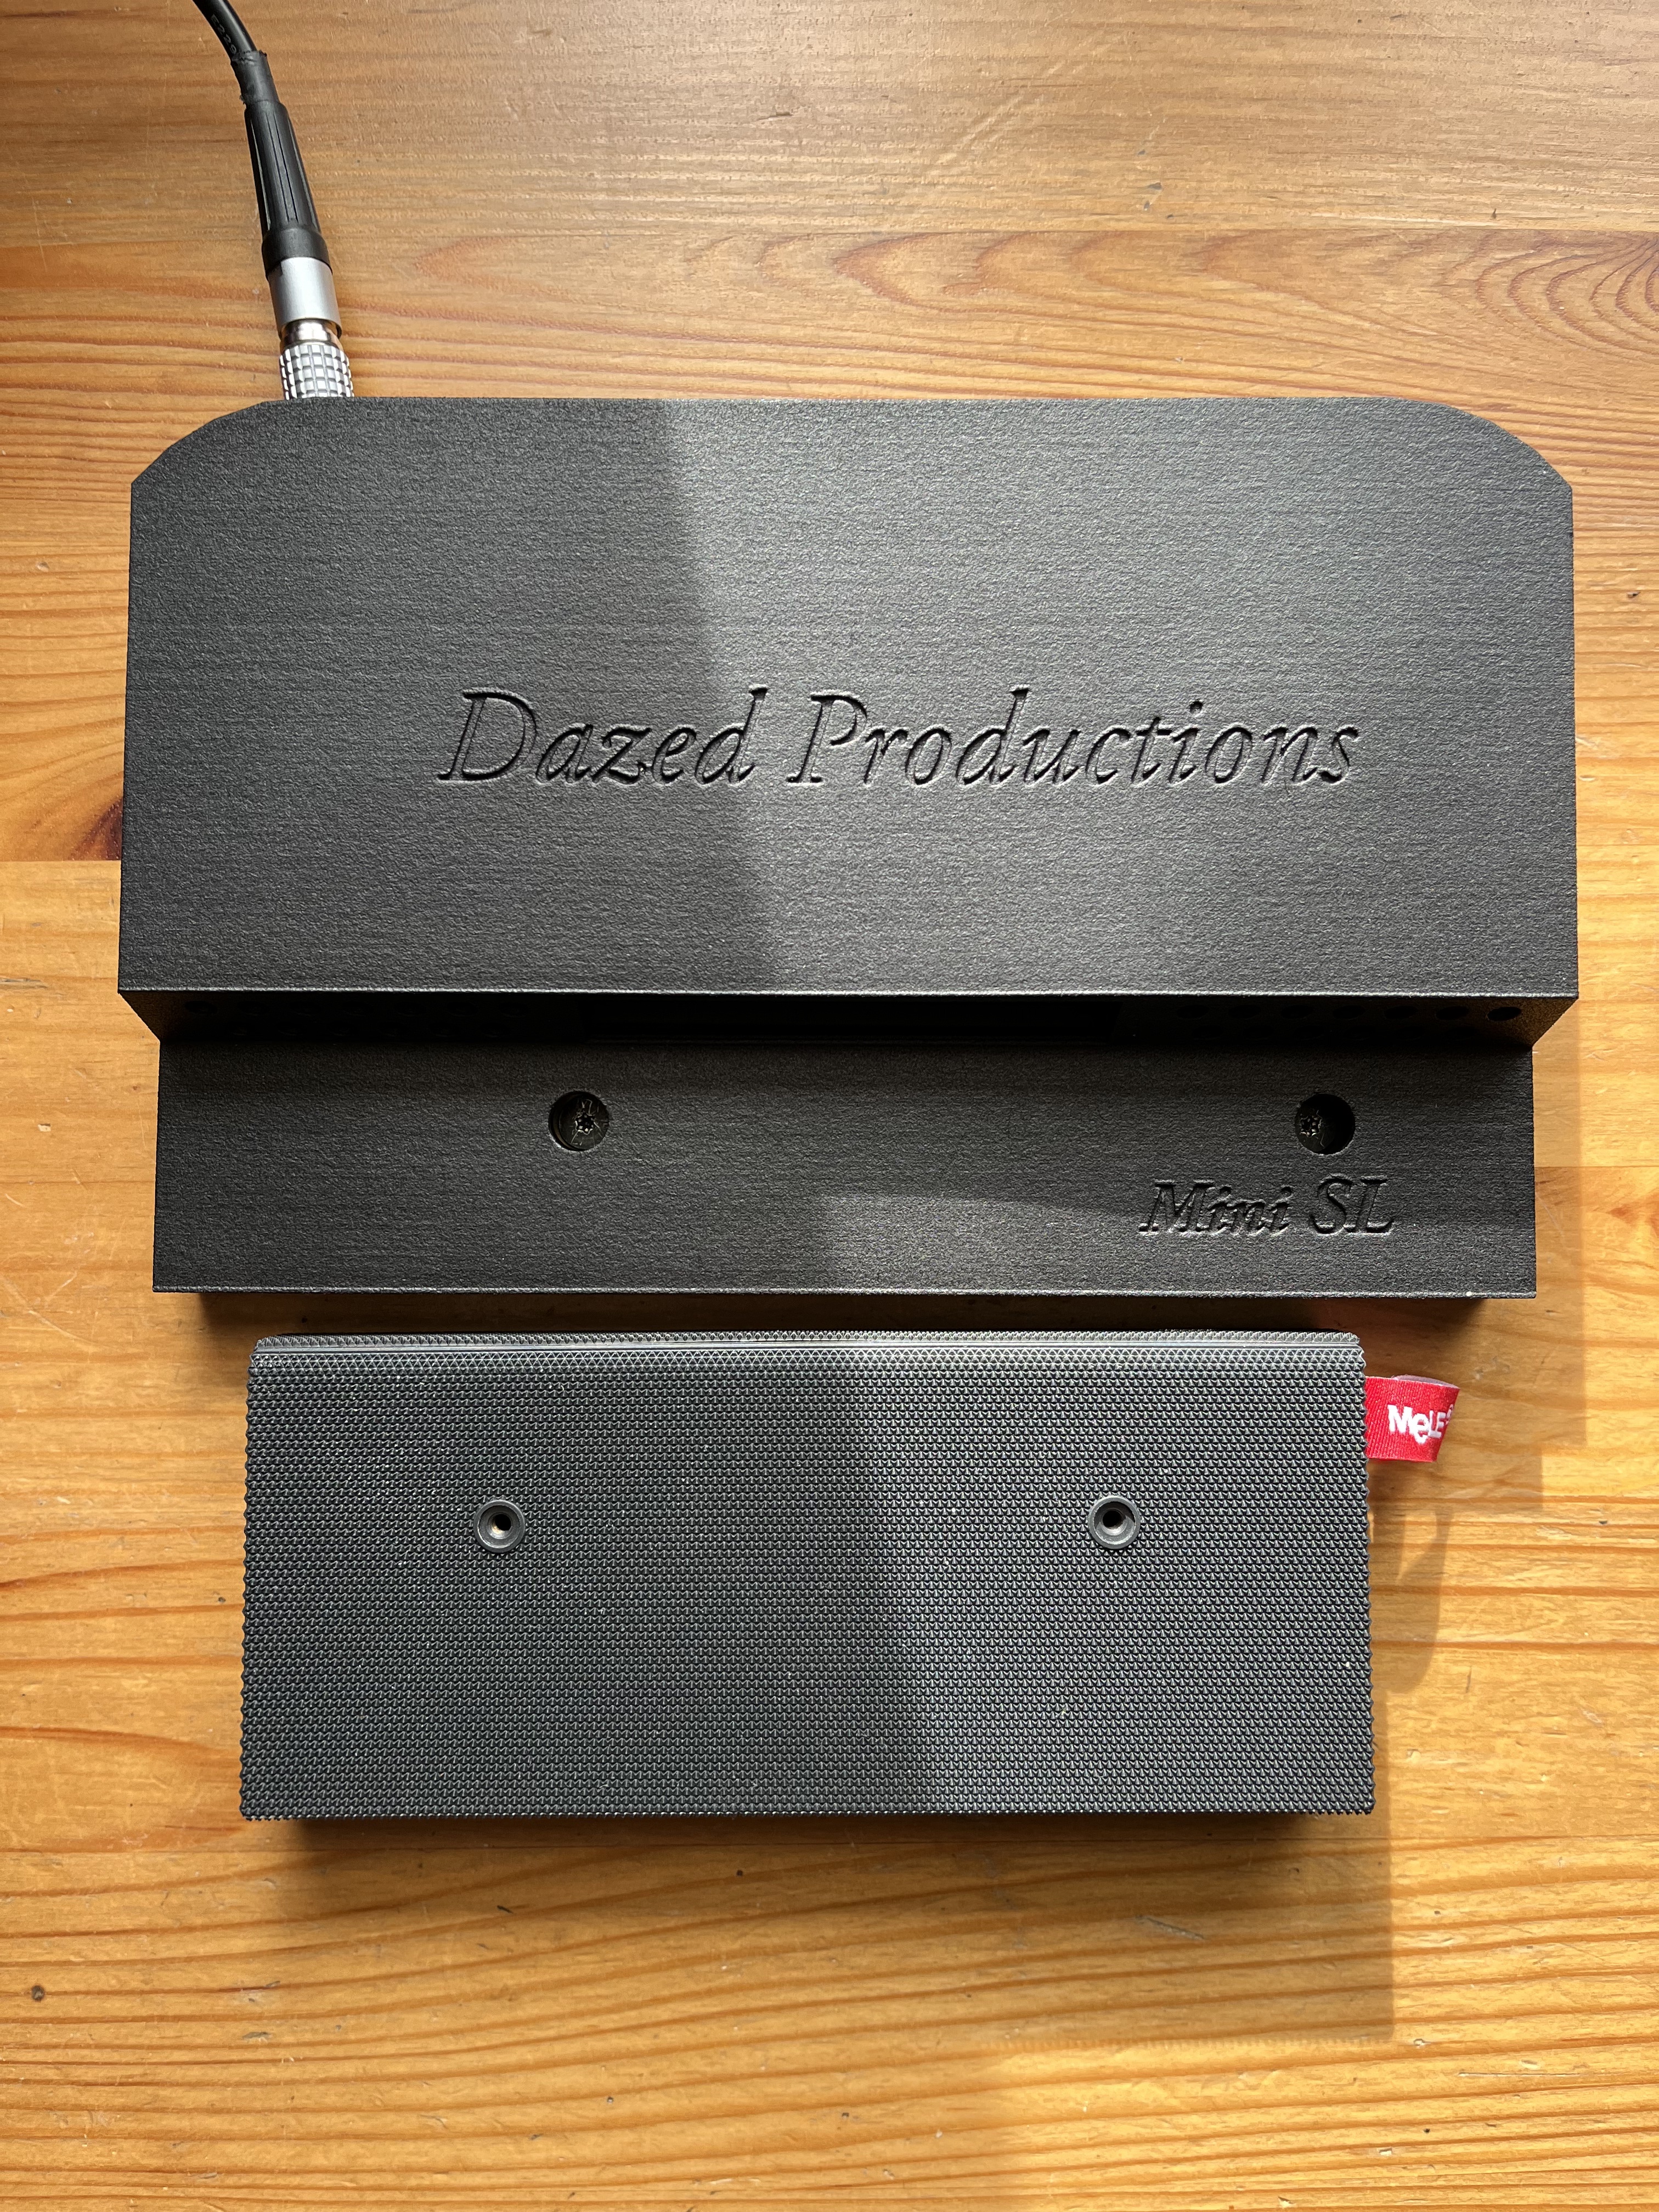
More than size, the aim of this project is light weight. Coming in under the NUC makes it a rough success. I say rough because the NUC has an M2 SSD and twin RAM slots, so it should be heavier. The Mini I suspect is a little porky due to the relatively large heatsink, I have forgotten what the Nuc one looks like but I think its probably smaller and the NUC therefore more fan dependent.Its also only a rough success in that the MiniSL is 1.8x the weight of the Mele, yes the SL has more than 1.8x the performance but CPU/GPU aside otherwise they are similar. Same 256GB Storage/8GB RAM, Both have WiFI 6 and BT5 (with mini slightly better spec), both dual 4k output, both passive cooling (although the Mele won’t overheat). The Mele also has a much more practical Micro SD card storage expansion (the SL needing a USB stick to achieve the same which is a pain when throwing in a bag). It lacks one USB-C port (and thunderbolt + Alt mode displayport)
The MiniSL now weighs less than the aluminium housing of the standard Mini!
Bare Weights
Mele PC bare weight 188g
Mac Mini M2SL bare weight- 344g
Custom 7th Gen i3 NUC bare weight- 406g
2017 Macbook 12″ no PSU- 937g
Standard Mac Mini M2 (Apple specified weight)- 1180g
Just the Mac Mini Chassis, the aluminium, no PSU, no power light, empty shell -497g
Mains Powered Weights
Mele PC weight based on already carrying a USB-C charger for the ipad- 188g
Mac Mini M2SL with cable based on already carrying a USB-C charger for the ipad- 389g
Mac Mini M2SL with Dual output PSU and cable- 476g
2017 NUC i3 with PSU- 580g

PoE Powered Weights
Mele PC with PoE+ PSU- 242g
Mac Mini M2SL with PoE+ PSU- 475g
(virtually the same as with a Mains PSU, slightly higher cable weight due to using a 2-part cable for DC powering flexibility)
Results -Power
USB-C/Mains
USB-C is really quite cool as a universal power supply and a generational jump over the 5V USB-A power. I already have lots of devices that use USB-A as a common power supply, sometimes with DC-DC conversion to get up to 12V. With USB-C one simply needs the right cable and a PSU that will output what is needed (and unfortunately some don’t). I had to upgrade the Anker PD1(which doesn’t work properly at 12V for either the Mini-SL or the Mele) to a Belkin dual output 45W adapter. This powers the Mini happily in all scenarios.
One sole issue with multiport PSUs is some drop power when re-negotiating. I have a Quad output RavPower charger, which works great but if anything new connections or disconnections are made it will drop power briefly, which will cause the MiniSL to reboot.
PoE+
PoE power was partially successful, partial fail. On PoE the MiniSL boots and will run for days. I can even max out the processor and its fine. If however, I run Geekbench it will brown out several minutes into the CPU test. It does not seem able to provide enough power for tasks which use both CPU and GPU.
Results- practicality and functionality
A combination of Apple Silicon and Ventura is just not practical for me. Even some OSX apps don’t install.Lots of playing around with windows ARM reveal that to be a real mixed bag. Its pre-release software (so no blame to be laid at Microsoft’s door). While I understand the differences (and this is a metaphor not a direct comparison) its a bit like going back to emulators rather than virtual machines. Some stuff works but its hit and miss and some vital software I just can’t run.
I have roughly the same hit rate installing a windows app with Wine as I do with windows Arm. Some installers just won’t run on ARM due to dependencies and/or the checking of dependencies. Anything requiring drivers is a no-go.
For me the end result is a powerful cool running machine with no real use case.
After creating this MiniSL, I bought the Mele PC, which while a lot slower, is a lot lighter, was a lot cheaper, will run anything I need. It also runs perfectly from PoE. It will become my main mobile compute device.
I keep my Mojave 2012 quad core i7 with its dual internal 4TB SSDs and 16GB RAM as my day to day office machine! Its flexibility trumps the speed of the M2 for me.
The Mini will become a bit of a laptop replacement for use in specific use cases and as a PoE media player. I expect it to get a fair amount of use as a desktop for the van.
For anyone that wants to replicate
This housing sleeve can easily be printed by downloading the STL and sending it to a printer. All it takes to install a Mini to the case is a M2.5 tap and a PCB with the DC presented on a connector of some sort. I did not modify the case in any other way.
A word of warning to anyone who wants to try this. The power button has a thin ribbon cable that runs by the corner of the shield. Its easy to catch this when manhandling it in and out of the case. i broke mine! Set to auto power up now (after I booted it by shorting the switch). I recommend re-routing the cable away from the corner as it can now pass in the void where the PSU was. I managed to replace the Apple cable with a generic 0.5mm pitch 6-pin ZIF cable as the part seems completely impossible to find.